Vegan Food Nerd


1 Comment

Dutch Apple Pie

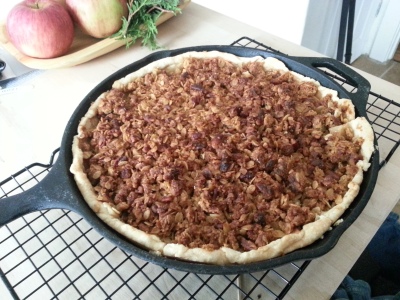
20141026_141021I’m not sure how I’ve never been apple picking before this year (at least not that I can recall) but it’s definitely a fun activity! We went to Carluke Orchards and got a mixture of Northern Spy, Empire, Mutsu and Golden Delicious apples.

We used the Spy and Mutsu apples to make some rustic apple pies, based on a recipe I found over on the Minimalist Baker’s website. Both of these apple varieties make a great pie as they hold their form and don’t cook down as much as a lot of other apple varieties. They also have the perfect tartness.

Original recipe here:

Deep Dish Apple Crumble Pie

We didn’t really change much, and we’ve now made four pies over the last few weeks. It’s a great recipe that is a huge crowd pleaser and will make your guest’s think you have incredibly impressive baking skills!

20141026_141150

20141026_141721

Notes:

  • We’ve tried the crust with a mixture of Earth Balance butter and Earth Balance shortening, as well as with just the shortening. Both produce a nice crust, but I thought the shortening alone produced the flakier crust.
  • We also tried the crust with half all purpose and half whole wheat pastry flour, as well as just all purpose. Both were great!
  • Halve the ingredients below if you only need to make one pie, but you may as well make 2 pies while you’ve got all the tools out and freeze it or bring to a gathering.
  • There’s no need to pre-bake the crust for this recipe.
  • The Earth Balance butter and shortening sticks are easiest to use as each packaged piece is marked in tbsp measurements. (1 box has 32 tbsp, 1 individual package from the box is 8 tbsp)
  • Serve with a dollop of coconut whipped cream or some dairy free ice cream.

Ingredients (for 2 pies)

Pie Crust (yields 2 10″ crusts)

2 heaping cups unbleached all purpose flour (or 1 cup unbleached all purpose, 1 cup whole wheat pastry flour)
1 tsp salt
6 tbsp cold Earth Balance butter (or sub EB shortening)
6 tbsp cold Earth Balance shortening
6-12 tbsp ice cold water

Pie Filling

14-16 apples, peeled, cored and sliced (Northern Spy and Mutsu work nicely)
1 1/2 cups sugar (brown or granulated)
2 tsp cinnamon
2 tbsp flour
lemon juice and lemon zest

Crumble Topping

2 cups rolled oats
1 cup almond flour
1 cup chopped pecans
2/3 cup brown sugar
pinch of salt
8 tbsp cold Earth Balance butter

20141011_161103

1. Preheat oven to 400 F.

2. To make the crust: Add flour, salt, butter and shortening to a food processor and pulse a few times until combined. You should have pea sized crumbs at this point. Add 6 tbsp of the ice cold water and pulse a few more times. At this point you may need to add more water, 1 tbsp at a time, until you have a nice dough that scrapes away from the bowl. 9 tbsp of water total seemed to work best for us.

3. Remove dough from the food processor bowl onto a well floured surface. Divide dough into two equal pieces and mold together with hands. Form each half into a 1 inch thick disc and then roll out into an even circle, adding more flour if it gets sticky. Roll onto a floured rolling pin to gently roll into your pie dish or cast iron skillet. Gently form your pie dough to your skillet or pie pan, trim if necessary, and crimp the edges if you desire although leaving it rustic works nicely here. Repeat with your second pie dough. Refrigerate while you prep the apple filling.

4. Apple filling. You can work with half the apple filling mixture at a time if you don’t have a large enough bowl. Mix together 7-8 of the apples, 3/4 cup of sugar, 1 tsp of cinnamon and 1 tbsp of flour for each pie. Add some lemon zest for a nice bright flavour for your filling. It’s actually best to toss everything together as you’re cutting the apples to prevent browning. You can coat the apple slices in lemon juice as well while you continue slicing!

5. Fill your pie dough with the apples. It should be nice and full.

6. Pie Topping: Add the crumble topping ingredients together, minus the butter, and mix together. Cut in the butter with a pastry cutter or fork. I actually used my hands as it worked better. Just work somewhat quickly to keep the butter from getting too warm. Divide over your pies, spreading evenly to coat, and push down slightly to pack the topping.

20141011_141712

7. Bake pies for 40-50 minutes, or until nicely browned and the apples are cooked but still have a bit of bite to them. At 40 minutes, top the pies with foil to prevent from getting too browned if the apples are not cooked through. Pop back in the oven until the apples are cooked.

8. Let rest before slicing. Serve warm!

20141026_14102820141011_161023


Leave a comment

Harvest vegetable stew

20141016_173321I’m sorry that I haven’t been posting very frequently this month. Life has been busy! We’re still cooking lots but I haven’t been taking the time to write down recipes and take pictures. However, this is the perfect season for a nice hearty stew so I wanted to put something together that is easy, yummy and filling that tastes like autumn in a bowl!
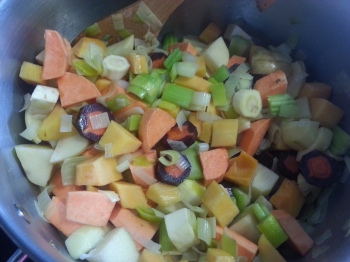
We have been getting bounty bags from the Mustard Seed Co-op that include a variety of local fruits and veggies and we had quite a bit left to use up after Thanksgiving, so I came up with this dish. I also used some leftover seitan roast we had made for Thanksgiving, and it went really well here. You can use your favourite veggie sausage chopped up instead, or make your own, or just leave it out! I apologize for not posting this last week when I made it in case you had some leftovers too.

Notes:

  • The tomato paste and balsamic vinegar in this dish really add to the flavour of the stew and will help round out the flavours. The added acidity they add is something I wouldn’t skip!
  • I used a mixture of mushroom and vegetable broths, but would recommend any stronger flavoured broths for this.
  • I wanted to add some chopped fresh pumpkin as well, but forgot that it was sitting on the counter!
  • My stew thickened up really nicely just by adding the lentils into the pot and letting them simmer in the pot for another 5 minutes or so. If you don’t find your stew is thick enough add a little cornstarch dissolved in water.

Ingredients

1 large leek (or 2 medium) cut into strips or small pieces
2 cloves of garlic, minced
1 inch piece ginger root, minced
1 small acorn squash, peeled and cubed
1 medium sweet potato, peeled and cubed
3-5 small potatoes, cubed
1 large parsnip, peeled and sliced 1/4″ thick
1 large carrot, peeled and sliced 1/4″ thick
2 celery stalks, 1/4″ pieces
2 tbsp freshly chopped herbs (sage, parsley, rosemary and thyme)
1/4 tsp smoked paprika
1/2 tsp ground coriander
1 tsp dried savory
1 tbsp tomato paste
6 cups veg broth
salt and pepper to taste
1 1/2 cups cooked brown lentils
1 cup leftover seitan, cubed (optional)
2 tsp balsamic vinegar

1) Saute leeks in 1 tbsp of olive oil until tender, about 5 minutes. Add garlic and ginger and stir and saute another minute, until fragrant.

20141016_160208

2) Add veggies (squash, sweet potato, potato, parsnip, carrot, celery) and saute 5 minutes longer, stirring occasionally.

20141016_160816

3) Add veggie broth, herbs, smoked paprika, coriander, savory and tomato paste and bring to a boil. Lower to a simmerand cook uncovered about 15 minutes, or until veggies are fork tender. Stir occasionally to prevent sticking. If veggies are not tender after 15 minutes, cover and allow to simmer another 5-10 minutes.

20141016_162225

4) Once veggies are tender, add lentils, seitan, vinegar and salt and pepper to taste.

20141016_165553

5) Heat through, simmering, about 5 minutes more. The addition of the lentils should thicken your stew up nicely. Check for salt and seasonings.

6) Let sit at least 10 minutes before serving to allow flavours to meld together. Serve with crusty bread!

20141016_173316


1 Comment

Cilantro-lime cashew cream

20141002_173044I used this as a topping together with a salsa roja on enchiladas but I’m only providing a recipe for the cashew cream sauce here, because I didn’t do any measuring for the rest of the dish. Sorry! However, if you’re new to cashew cream recipes, this will be a great one to add to your repertoire. It’s really flavourful and added a great dimension to the enchiladas, and I imagine it would be great for any Mexican inspired cooking in your household. I plan to use the leftovers with tacos since I got soooo many corn tortillas in the pack I picked up at the market today.
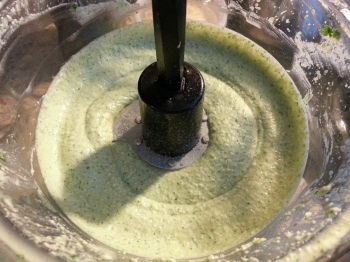
It would also be great to use as a topping for risotto or quinoa cakes, vegan chilli, or for your next buddha bowl. It tastes great uncooked, but it also worked out well baked with the enchiladas. Let me know where you end up using it!

Notes:

  • If you’re unprepared, like I often am, you can boil the cashews. Simply add to a pot with plenty of water and boil for 30 minutes. Just watch the water level as the cashews soak up the water. Allow to cool before blending.
  • Feel free to experiment! Add some roasted red peppers, or some different spices.
  • If you’re not sure how spicy your jalapeno will be, add less and taste your sauce. You can always add more spice.
  • The enchiladas I made had a sweet potato, black bean, red pepper and mushroom filling spiced with cumin, chilli powder, ground coriander, smoked paprika and salt and pepper. We also added some of this sauce to the inside of each tortilla before adding the filling and rolling. Feel free to make something similar because it was a great combination.

Ingredients

1 cup cashews soaked for 4-6 hours or overnight, then drained
1/2 a large avocado, or 1 whole small/medium avocado
2 limes, juiced
2 cloves garlic
1 cup of fresh cilantro
1/2 cup to 3/4 cups water
1/4 to 1/2 jalapeno sliced
1/2 tsp salt
pinch of cumin

20141002_174114

my poor tortillas broke as I rolled them..next time I’ll remember to heat them slightly!

1) Add all ingredients to a food processor or powerful blender and process until smooth. Be sure to scrape down the sides of the bowl occasionally and give your motor a rest every once in awhile. It will likely take 4-5 minutes to get it to a really smooth consistency. Add more water if the sauce is too thick.

2) Taste for salt and seasonings and spice. Add as you please and process again until smooth. If your limes aren’t particularly juicy you will likely need to add more lime (mine were big and juicy!).

3) Use as a topping for enchiladas, tacos, tostadas or any other recipe calling for a delicious sauce!

20141002_172546

20141002_173105


Leave a comment

Beet soup

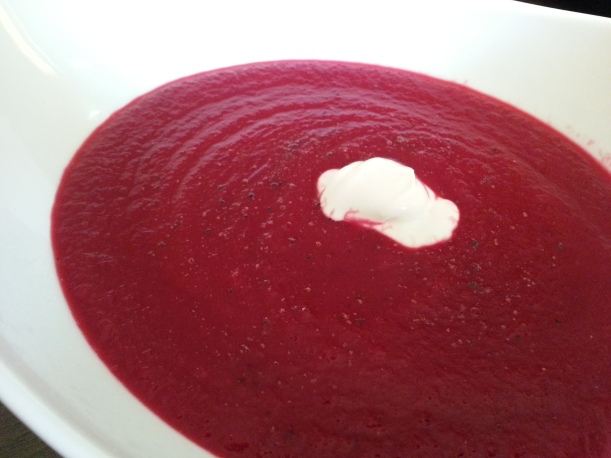
20140925_182859I wanted to call this a borscht, but I’m not entirely sure if it can be classified as one. I mean there are some beets puréed into a delicious soup here, but I threw in a few extra veggies I had in the fridge that I don’t think are normally found in borscht. Regardless, this is really, really delicious. I love the earthy flavour beets lend to the soup, as well as the crazy colour!

This soup comes together fairly quickly, as long as you cook your beets ahead of time. I cooked the beets the day before and peeled and cut them as the veggies were simmering away. Delicious soup in minimal time is always a great goal!

Notes:

  • Steam or boil your beats until they are soft. This helps bring out their sweetness!
  • The agave helps to balance the soup flavours – use coconut sugar or other sweetener if you prefer. Or leave it out entirely.
  • My onion was really big – the soup doesn’t get overly oniony or anything though.
  • Feel free to make your own sour cream – I just didn’t have time to!
  • Serve with some crusty bread.

Ingredients

1 large white onion, diced
1 1/2 tbsp olive oil
1 red pepper, diced
3 small carrots, sliced
3 small purple potatoes, cubed
2-3 large stalks of celery, chopped
2 cloves garlic, minced
4 cups vegetable broth (I used mushroom)
4 cups of cooked beets, roughly chopped
1/2 tsp hot paprika
salt and freshly ground black pepper
juice from half a lemon
1 tbsp tomato paste
1 tsp agave syrup (optional)
1/4 cup almond milk
Veg sour cream for garnish (I used Tofutti brand)

20140925_17132620140925_1713071) Preheat a large heavy bottom pot over medium-low heat. Add olive oil, onions and a few pinches of salt and saute until onions are translucent, about 5-6 minutes.

2) Add carrots, celery, red pepper and garlic and continue sauteing for a few minutes longer. Add potatoes, broth, paprika and some freshly ground black pepper. Cover and bring to a boil. Remove lid and lower heat – allow vegetables to simmer for about 15 minutes or until they are tender.

20140925_174119

3) Add beets, tomato paste, lemon juice and agave and simmer for another 5 minutes, or until the beets are heated through.

20140925_174140

20140925_174936

4) Remove from heat and use a hand blender to puree the soup with the almond milk until very smooth. Taste for salt and seasonings and add more salt and pepper if needed. If your soup is thicker than you’d like add some more almond milk.

20140925_175913

5) Allow to sit for at least 10 minutes before serving to allow flavours to develop. Serve garnished with more black pepper and a dollop of vegan sour cream.

Makes 6-8 servings.

20140925_18271720140925_182948

20140925_183152

delicious, even if it does start to look a bit like a crime scene as you eat it..


11 Comments

Sausage and dumpling dill stew

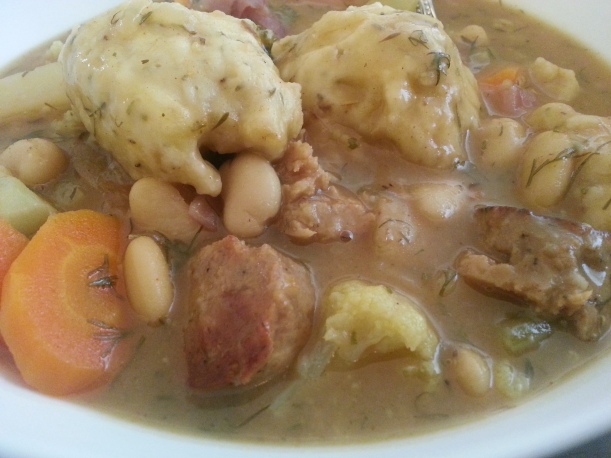
20140923_175206This is one of my favourite stew recipes from Isa over at theppk.com. Her Dilly Stew with Rosemary Dumplings is just so delicious and perfect for the first day of fall (or any day in the fall/winter). I made a few small changes by adding some Field Roast apple and sage veggie sausages as well as some cauliflower, but otherwise was pretty true to the original recipe. You must make either Isa’s original version, or the version below if you want to eat delicious, comforting food. And I know you do!

Notes:

  • Slice and saute your veggie sausages first for some additional flavour.
  • The original recipe calls for sweet paprika, but I used hot and smoked paprikas instead for a nice change.
  • Instead of using all AP flour as was called for in the original recipe, I used a mixture of flours that produced a much lighter and fluffier dumpling. Use all AP flour if you prefer a denser dumpling!
  • I cooked my roux for an extra minute, and cooked the onions until the flour was quite dark – my goal was to add more flavour to the stew which worked here. I have made this recipe quite a few times, and cooking your roux for the normal amount of time is also delicious.

Ingredients

Stew:

3 tablespoons olive oil
1/4 cup all purpose flour
1 medium sized sweet onion, quartered and thinly sliced
1 teaspoon salt
3 cloves garlic, minced
6 cups vegetable broth, at room temperature
2 stalks celery, tops removed, sliced 1/4 inch thick
1 1/2 pounds potato, in 3/4 inch chunks (about 2 1/2 to 3 cups)
2 1/2 cups cauliflower, cut into bite size pieces
1 large carrot, 1/4″ slice on the bias
1 tbsp fresh thyme, or 1 1/2 tsp dried thyme
2 tbsp chopped fresh dill
1/2 tsp smoked paprika
1/4 tsp hot paprika
Fresh.y ground black pepper
1 15 oz can white beans, rinsed and drained (about 1 1/2 cups)
2 Field Roast Smoked Apple Sage sausages, cut into 1/2″ slices

Dumplings:

1/2 cup unbleached all purpose flour
1/2 cup whole wheat pastry flour
1/2 cup cake/pastry flour
2 teaspoons baking powder
1 tablespoons dried rosemary, finely chopped
1/2 teaspoon salt
freshly ground black pepper
3/4 cup unsweetened almond milk (or soy)
2 tablespoons olive oil

20140923_175213

Directions

1) Preheat a large, heavy bottom pot over medium-low heat. Add the olive oil and sprinkle in the flour to make a roux. Use a wooden spoon or wooden spatula to toss the flour in the oil, stirring consistently, for 3-4 minutes. The flour should be clumpy and toasty.

2) Add the onion and salt and toss to coat the onions completely in the flour mixture. As the onions release moisture, they will coat more and more. Cook this way for 5 minutes, stirring often. Add garlic and stir for 30 more seconds or so.

20140923_1700523) Stream in the vegetable broth, whisking constantly to prevent clumping. Add the celery, potatoes, carrot, cauliflower, dill, thyme, paprika and black pepper, then turn the heat up and cover to bring to a boil. Keep a close eye and stir often, so that it doesn’t clump or boil over.

20140923_1705084) Once boiling, reduce the heat to a simmer and let cook uncovered for 20 to 25 minutes, stirring occasionally, until the stew is nicely thickened and the potatoes and carrots are tender.

20140923_170636

5) In the meantime, prepare the dumplings. Sift the flour, baking powder, pepper and salt together in a large mixing bowl. Mix in the rosemary. Make a well in the center and add the milk and olive oil. Use a wooden spoon to mix together until a wet dough forms.

6) Heat a cast iron skillet with a little bit of olive oil and brown your sausage pieces.

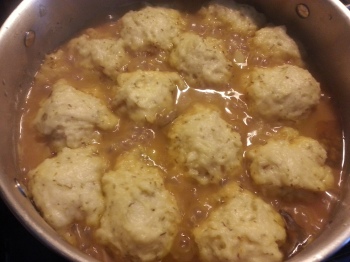
6) When the stew is ready, mix in the beans and veggie sausage and plop dough right on top of the stew in spoonfuls. You should get about 13-14 dumplings.

20140923_1730417) Cover the pot tightly and cook for about 14 more minutes. The dumplings should be nice and firm. Use your ladle to dunk them into the stew to coat.

20140923_174442

8) Ladle stew into bowls, topped with dumplings. And serve!

Makes 6-8 servings.

20140923_174620


Leave a comment

Lentil curry (a veggie packed dahl)

20140919_190539

So first thing’s first. Sometimes recipes don’t work out the way you intend them too. Sometimes, you plan and you put in lots of meticulous effort, and still…something goes wrong. Many times that means ruining a recipe, but in some cases you end up with a happy accident! That may be what happened here. What was supposed to be a red lentil curry soup, ended up as a puréed curry with a side of spiced rice (see notes), and it was absolutely delicious. Not at all what I had intended to make, but still lovely to eat!

This all started when I realized I was out of the red lentils I needed for the soup and subbed them with yellow split peas. I don’t remember yellow split peas taking eons to cook (and the package said they only needed 25-30 minutes to boot) yet mine just didn’t want to cook down. So this meant the soup had to stay on the stove so long that the veggies got way too mushy to be eaten as soup. I thought the hand blender would salvage the giant pot of gorgeous veggies and aromatic spices, and it worked out fine! This all got blended up and tasted like a really delicious Indian dahl dish. So, if that’s what you would also like, follow the instructions below.

Notes:

  • If you would rather have a soup, use red lentils as they will break down much more quickly and you’ll end up with the perfect veggies. Or, even with red lentils, go ahead and puree the batch for a curry. Yellow split peas don’t normally take an hour to cook like they did for me, so either ingredient should work fine for you!
  • I served this with brown basmati rice flavoured with cardamom and cloves. Cook your rice as per the package instructions, but throw in a handful of cloves and green cardamom pods when you add your rice to the water. For 1 cup of rice I used about 13-14 cloves and 7-8 cardamom pods. I also used a tsp or two of coconut oil to prevent sticking. The rice had a great flavour that contrasted well with the curry. (Just remember to remove the cloves and pods before serving)
  • We also ate the curry and the rice with some onion bhajis. Yum!
  • This makes a large vat, so halve the recipe if you don’t want a bunch of leftovers.

Ingredients

1 tbsp coconut oil
1 yellow onion, diced
2 large cloves of garlic, minced
1 tbsp minced, fresh ginger
1 1/2 tbsp curry powder
1 1/2 tsp coriander, ground
1 tsp cumin, ground
1 tsp garam masala
1/2 tsp hot paprika
1/4 tsp saffron turmeric
1/2 large head cauliflower (8 cups)
2 small red potatoes
2 small sweet potatoes
1 cup yellow split peas or red lentils
8 cups vegetable broth (or 6 cups of broth, 2 cups of water)
salt, to taste
freshly ground black pepper, to taste
4 cups packed greens such as kale and swiss chard
chopped fresh parsley or cilantro for serving

20140919_190543

Directions

1) In a large pot, heat the coconut oil over medium heat. Add onion and saute until translucent, 4-5 minutes.

2) Add fresh ginger and garlic and heat for another 30 seconds – 1 minute, stirring, until fragrant. Add spice mixture (I like to get mine all measured out in a ramekin so it’s ready to go) and add to the pot. Cook for another minute or two, stirring, to toast the spices.

20140918_17060520140918_1711083) Add 6 cups of the vegetable broth, and the red lentils or yellow split peas to the pot. Bring to a boil, then lower heat and simmer for 5 minutes longer. Simmer for 10 minutes if using split peas.

20140918_1718404) Add cauliflower and potatoes. Cover and simmer for 20-25 minutes, until veggies are tender. If you need more liquid, add more broth or more water to the pot. If using red lentils they should have broken down after 25 minutes and you can go ahead and enjoy this as a soup. If not, keep cooking until everything is cooked. You can puree or not depending on your preference.

20140918_16581720140918_172626

5) Taste for salt and seasonings, adding more as desired. Add greens and cook until wilted. Stir in freshly ground black pepper.

6) Either ladle into bowls and enjoy as a soup (even the pureed version), or serve with rice. Garnish as desired.

Makes around 8 servings

20140918_18532720140919_190423


4 Comments

Onion Bhajis

20140919_185950I’ve been lucky to live in England and get to enjoy some really fabulous Indian food. Hamilton has it’s fair share of decent options though, and living on the East side means we get to feast on the Himalya whenever the craving strikes. The Himalya is all veg Indian fare and they have a great vegan thali special.

I have always loved the variety of veggie options and pakoras and onion bhajis are a favourite. My parents gave us a bag of onions they picked up from a farm so we thought we’d make some bhajis to go with a lentil curry (recipe for the curry coming soon).

Notes:

  • I wanted to try baking these to see if they would turn out, but we weren’t sure. If you try baking them let me know if it works out for you!
  • You can alter the spice mixture if you like, but these were really flavourful with just a little bit of heat. Increase the chillies or add some chilli powder to make them spicier.
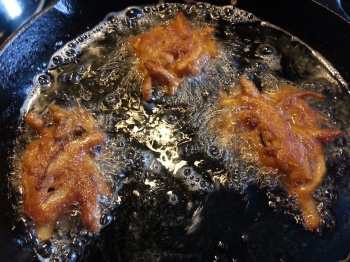
  • We didn’t try to form the bhajis at all, so they are kinda rustic looking. Cut your onion slices in half to help with shaping into more of a ball and less spider shapes will result.

Ingredients

1/2 large white onion, finely sliced
1/2 large red onion, finely sliced
2 cloves of garlic, mashed
1 thumb of ginger, finely chopped
1/2 tsp turmeric
1/2 tsp garam masala
1 tsp whole cumin seeds
1/2 tsp ground cumin
1 tsp ground coriander
1/2 tsp baking soda
1/2 tsp chilli flakes
1 cup of chickpea flour + 1-2 tbsp
6-8 tbsp water
1 tbsp vegetable oil, plus oil for frying
salt

20140919_190623

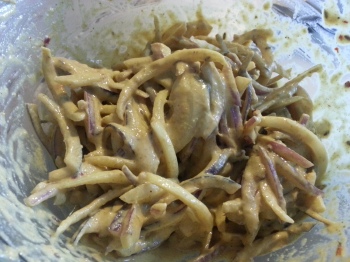
1) Add sliced onions to a bowl and separate each slice. Add spices, garlic and ginger and mix.

2) Add 1 cup of the chickpea flour, 1 tbsp of oil and 6 tbsp of water and mix. You may want to add up to 2 more tbsp of chickpea flour and water to make a batter to coat the onions that isn’t too thick. Some onions may release more liquid than others as well which will create a thinner batter.

20140919_183645

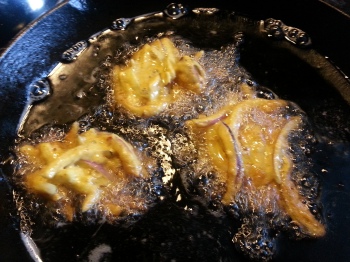
3) Heat about 1/2 inch to 1 inch of vegetable oil in a frying pan or cast iron pan. You want it hot but not so hot that your bhajis will get dark brown too quickly without cooking the onions. Drop a bit of batter in the oil and if it starts to sputter it’s ready.

4) Drop a spoonful of the onion mixture into the pan without crowding and fry until browned on both sides. At least 2-3 minutes per side worked for us.

20140919_183942

20140919_1840425) Place cooked bhajis on a paper towel lined plate to absorb the excess oil. Sprinkle with a little bit of sea salt. You can leave them in an oven at 250 F to keep them warm. Serve hot!

Makes 12 bhajis

20140919_190007


1 Comment

Spicy Beer Brined Pickles and Garlic Dill Pickles

20140906_181422

Pickles Pickles Pickles! This is a super fun canning project, because it’s quite easy and you can adapt your spices and flavourings to suit your tastes. We experimented with a bunch of different brines and flavourings and I am going to share our Spicy Beer Brined Pickle recipe with you. Scroll down for Garlic Dill Pickles!

Now, keep in mind, that pickle recipes can be a bit difficult to measure out. We bought one small basket of pickling cucumbers and it ended up making over 6 litres in total of jarred pickles. (Not completely sure on the weight, maybe 6-8 lbs?). We started with a small pot of brine, and then made more brine as we kept cutting up the cucumbers and filling jars. The brine is really easy to make, and comes to a boil quickly, so feel free to start with the recipe here (especially if you don’t have a lot of cucumbers) and then make more as you need it to minimize waste.

Notes:

  • We processed our jars for a longer shelf life. This does make the cucumbers a bit softer.
  • Please be aware of proper canning techniques before attempting this recipe. We used a water bath canner, small pot to keep lids/seals warm, a metal ladle, canning tongs, canning funnel, etc. You will need to sterilize your jars prior to filling.
  • Feel free to experiment slightly with the amount of spice, garlic, and dill. In some jars I added double the garlic, while in others I increased or decreased the dill and pickling spice.
  • You can make your own pickling spice by the way – but it was really cheap at the Bulk Barn so I used the premixed kind for both these pickles and the pickled jalapeno recipe I had shared in a previous post.
  • You can also use more beer and reduce it on the stove to get it down to two cups for a stronger beer flavour. If you do not do this the beer flavour is quite subtle.

Ingredients

2 cups beer
2 cups vinegar (white distilled)
1 tbsp pickling salt
pinch of sugar
pickling cucumbers, washed and scrubbed (at least 3 lbs, if using more double or triple brine recipe as needed)
1/2 tbsp pickling spice (if using medium jars – 500 ml)
1 clove of garlic per jar – cut into chunks, slices, or diced
a few sprigs of fresh dill heads per jar (optional)
1 small hot cherry pepper – cut into chunks, slices, or diced

20140906_181531

1) In a medium saucepan combine beer, vinegar, pickling salt and sugar. Bring to a boil, stirring to dissolve salt and sugar.

2) Prepare cucumbers by cutting off the blossom end and then cutting into slices, quarters or rounds. We preferred quarters, but also tested a few other shapes in some of our other brines.

3) In sterilized jars, add 1/2 tbsp of pickling spice, garlic and hot peppers to each. Add dill heads if using.

4) Pack pickles in as tightly as possible, trimming if necessary to fit the size of the jar.

5) Pour super hot brine into jars, and seal.

6) Repeat until you have no cucumbers left. Process jars in a hot water bath for 10 minutes. Remove and place on a kitchen towel or newspaper in a draft free location for at least 24 hours. Check to make sure seals have popped.

Wait 1 week minimum before tasting.


Garlic Dill Pickle Recipe

20140906_181602

Similar to the recipe above, you may need to make more brine depending on how many pickles you have to make.

Ingredients

2 cups water
1 cup white vinegar
1 cup apple cider vinegar
1 tbsp pickling salt
pickling cucumbers, washed and scrubbed (at least 3 lbs, if using more double or triple brine recipe)
1-2 cloves of garlic per jar (sliced, diced or in chunks)
1 tbsp of pickling spice per 1 L jar
1/2 tsp dill seed per 1 L jar
4-6 fresh dill heads per 1 L jar

20140906_181414

1) In a medium saucepan combine water, vinegar, and pickling salt. Bring to a boil, stirring to dissolve salt.

2) Prepare cucumbers by cutting off the blossom end and then cutting into slices, quarters or rounds. We preferred quarters, but tried a few other shapes with this brine.

3) In sterilized jars, add pickling spice, garlic, dill spice and fresh dill heads to each per the amounts suggested above.

4) Pack pickles in as tightly as possible, trimming if necessary to fit the size of the jar. You may end up with a few of your quarters cut in half but they will still taste great.

5) Pour super hot brine into jars, and seal.

6) Repeat until you have no cucumbers left. Process jars in a hot water bath for 10 minutes. Remove and place on a kitchen towel or newspaper in a draft free location for at least 24 hours. Check to make sure seals have popped.

Wait 1 week minimum before tasting.

20140906_181501

you can also make some smaller jars as they make great gifts. just adjust your spices as needed.

20140906_181633

try adding some dried hot chillies for a spicy version!


1 Comment

3 layer chocolate bars

20140918_195343Chocolate has always been my vice. I was never much of a candy fan and still don’t seek out vegan gummies or candies in that sense. However, when I went vegan I thought I wouldn’t be able to enjoy chocolate in the same way again and was worried that would make it difficult for me to stick with it. I was wrong though! I discovered that dark chocolate has such a richer flavour and I have really come to enjoy the higher cocoa percentage that milk chocolate lacks. That and it helps knowing that the more cocoa bean present, the better the chocolate is for you as it is a greater source of flavonoids (a special class of antioxidants). The great thing is, you really only need a square or two to be satisfied too!

(There are still companies that add milk ingredients to their dark chocolate products, so please be sure to look at the label before consuming.)

I know this says chocolate bar in the title, but they are much healthier than purchasing the store bought sugar filled variety! By controlling the sweetener and choosing some healthier ingredients, you can feel much less guilty enjoying one of these. They are not completely enrobed in chocolate but they aren’t lacking chocolate flavour at all. I ate one of these and then immediately shared a second one and I am pretty sure I could eat the whole batch at once, so please be warned that these are super yummy! The crust adds almost like a cookie base, while the middle layer is fudgey and soft, with a perfect coconutty chocolate coating. And if you are concerned about gluten, these can easily be made gluten free (see notes). I just happened to have gluten free versions of ingredients so I went with it.

I adapted this recipe from Oh She Glows. Original recipe here.

Notes:

  • I made some changes to the recipe based more on my pantry than anything else.
  • I also used a 9 inch square pan instead of 8 inch – use an 8 inch pan if you want thicker layers and add a few minutes to the crust’s baking time.
  • If you use gluten free oats, this is a gluten free recipe. I use Bob’s Red Mill brand. I also used gluten free whole grain brown rice crisp cereal.

20140918_154308

  • Feel free to garnish with chopped, toasted nuts or toasted coconut when you’ve added the melted chocolate layer. I simply forgot to.

Ingredients

Bottom Layer

3/4 cup almond flour
1/2 cup oat flour (I made mine. See step 2)
1/4 cup coconut oil, melted
3 tbsp maple syrup or agave
pinch of sea salt
1 cup rolled oats

Middle Layer

1 cup all natural peanut butter (or almond butter)
1 tbsp cocoa powder (optional)
1/2 cup coconut oil
1/4 cup maple syrup or agave
1/2 tbsp vanilla extract
pinch of sea salt
2/3 cup rice crisp cereal

Top Layer

1/2 cup vegan chocolate chips (I used Ghirardelli semi-sweet but dark chocolate would also work great)
1/2 tbsp coconut oil
1/4 cup shredded unsweetened coconut

Directions

Bottom Layer

1) Preheat oven to 350 F and line a 9 inch square pan with two pieces of parchment paper (going each way in the pan) for easy removal of your bars later.

2) If making oat flour, put 1/2 cup of rolled oats into your food processor and process until ground.

3) Add almond flour, coconut oil, liquid sweetener and sea salt and process until combined.

4) Add the rolled oats and process to form a dough – the oats should not be completely chopped up and it should stick together when you press between your fingers.

5) Press the dough evenly into the prepared pan using wet hands to prevent sticking. I just used my fingers to press it out but you can use a pastry roller if you have one.

20140918_152750

6) Poke a few holes in the crust with a fork and pop in the oven for 11 minutes. Remove and place on a cooling rack for at least 10 minutes before adding the second layer.

20140918_154053

Middle Layer

7) In a medium saucepan, add peanut butter, coconut oil, liquid sweetener, vanilla and salt and heat over medium heat. Add cocoa powder here if also using. If you leave it out your middle layer will have a slightly different colour/taste. Stir until the coconut oil is melted and the mixture has a nice smooth texture.

20140918_154536

8) Remove from heat and when the crust has cooled pour the peanut butter mixture over top of your bottom layer.

9) Smooth with a rubber spatula and place in the freezer for at least 40-45 minutes to set completely.

20140918_155236

Top Layer

10) In a small saucepan, melt the chocolate and coconut oil over medium heat.

11) Remove from heat and stir in shredded coconut.

12) Remove bars from the freezer and pour over melted chocolate, spreading evening with a rubber spatula.

13) Return to freezer to set the chocolate. When it is solid, cut into bars by slicing into 6 rows vertically and 3 rows horizontally.

14) Store in the fridge or freezer as they melt quickly. Serve before they have a chance to melt!

Makes 18 bars.

20140918_195430


5 Comments

Liebster Award

I have been nominated for the Liebster Award by a lovely blogger named Lissa over at The Kitchen Rebellion.  Thank you Lissa!

Liebster-Award

I have done a little bit of internet research, and the Liebster Award is given to bloggers by bloggers. The idea is to nominate newer or smaller blogs (ie. those with less than 200 followers) to share some more information about themselves, and in the process help promote and explore some new blogs. It’s basically all about spreading love amongst the blog community, and I am honoured to be included. I started this blog less than a month ago, and already I have made some wonderful connections and discovered some really great blogs.

Since I am currently participating in Vegan MoFo, I will be nominating some of the wonderful vegan food blogs I have discovered that are also participating.

Here are the rules:

1. Answer the questions given and then come up with 10 new ones to ask your nominees.
2. Nominate 8 other blogs, let them know you have nominated them and put a link to their blog in your post.
3. No Tag backs.
4. Nominees must have under 200 followers on any platform. (This can be difficult to determine if not listed!)
5. You must tell all the blogs that you nominate that you have nominated them

So here goes!

1) Do you have a favourite cookbook?

  • I have a few! Isa’s cookbooks tend to be my go to choices for everyday meals (ie. Veganomicon and Appetite for Reduction) – everything out of these books always tastes great! For dinner parties or fancier options I’d have to go with Vegan Secret Supper. We just picked up the Oh She Glows cookbook and I’m sure it will soon become a favourite.

2) If you had to choose one recipe on your blog for us to try, which would it be?

3) Who are your biggest inspirations?

  • In the kitchen? My mom and nonna have probably taught me the most in the kitchen, most of the time just from observing. My partner in crime/the dude in my life has definitely been my more recent inspiration. His culinary skills have helped me learn a lot and cooking together is one of my favourite ways to experiment and try new things.

4) What is the favourite piece of clothing in your wardrobe, and why?

  • Probably the new fleece tights I picked up for winter – they are so warm and dress season can continue! That or any of my cozy sweaters. Sweaters are the best.

5) What is your favourite one hit wonder?

  • Biz Markie – Just a Friend

6) When do you feel most awesome?

  • Every time a recipe looks and tastes great! Also, while teaching a fun topic. I do love my job.

7) What is the first thing you learned how to cook?

  • Eggs. Scrambled, soft boiled and every other way you can imagine. (My childhood self didn’t know I would stop eating eggs in the future)

8) Do you plan your meals each week?

  • Not in super fine detail. I’d like to be better at planning my week’s meals, but instead it tends to be planning for some meals and just picking up what looks good/what’s in season and turning them into something.

9) Do you have any pets? 😀

  • Yes. Her name is Molly and she’s a black cat.

10) What is one piece of advice that would you give to people who are brand new to vegan cooking?

  • Keep it simple at first and then try to add in more recipes to your repertoire and try more complicated things as you go. Also, use theppk.com and Isa’s cookbooks because they won’t make you miss your pre-vegan days!

Thanks for reading! I nominate the following yummy food blogs that I may not have learned about if it were not for Vegan MoFo:

Your questions:

  1. What is the most memorable meal you’ve had?
  2. What’s your favourite music to cook to?
  3. What’s your biggest guilty pleasure?
  4. Do you like to read? If so, what novel/book would you recommend?
  5. Is there one blog you have been most inspired by?
  6. What 5 pantry staples can you not live without?
  7. How do you wind down from a crazy, hectic day?
  8. What’s your favourite board game?
  9. Which three people (alive or dead) would you invite to a dinner party this weekend? Why?
  10. What’s your favourite quote? If you don’t have one, how about a favourite joke?